
Cutting Out Image Foregrounds with GIMP

Want to create a custom dataset?
👉Check out the Courses page for a complete, end to end course on creating a COCO dataset from scratch.
Get GIMP
GIMP is a cross-platform, free, open source, image editing tool. You can download it from https://www.gimp.org/
(Optional) Configure GIMP Window Mode
The screenshots in this tutorial are using GIMP in Single-Window Mode, which may look different than what GIMP does by default on your system. On Linux, for example, GIMP defaults to 3 separate floating panels over top of whatever is behind it.
To change this, in the top toolbar of GIMP, go to "Windows" and select "Single-Window Mode" from the dropdown menu.
GIMP Basics & Helpful Tips
I would recommend you search YouTube for some beginner tutorials if you get stuck somewhere in these steps. Here are a few tips that will probably be helpful.
Get familiar with the Zoom tools under ["View" > "Zoom"] and also the magnifying glass icon in the upper-left toolbox, which will allow you to draw a box and then zoom in on that area. A particularly helpful tool is ["View" > "Zoom" > "Fit Image in Window"] if you zoom too far in.
You can de-select by going to ["Select" > "None"].
Some operations require multiple steps and you have to press the Enter key to proceed (or the Esc key to exit).
When you're painting on an image, it's often easier to do lots of short strokes and undo a stroke if you mess up (Ctrl + Z). If you try to do it all in one stroke, it's a lot harder.
Edit Your Image
Open your image. ["File" > "Open..."]

Crop the Image
Use the Rectangle Select Tool ["Tools" > "Selection Tools" > "Rectangle Select"] to select just the part of the image you want. (Not pictured)
Crop the image with ["Image" > "Crop to Selection"]

Isolate the Object
Determine Edge Pixel Count
Zoom in on the edge of the object you are selecting.
Get a rough count of how many pixels are fading between the object and the background.
In my case, the edge of the lemon seems to be about 6 or 8 pixels. This won't be a precise number, just try to be somewhat close.
We'll use this number in a couple steps when we tell the selection tool how many pixels to "Feather", which is basically just when to start fading to transparent.

Foreground Select Tool
The Foreground Select Tool lets you color in 3 different regions (Background, Foreground, and Unknown), then automatically creates a selection for you around the edges of your object.
Start the Foreground Select Tool ["Tools" > "Selection Tools" > "Foreground Select"]
Draw a polygon around the edges of your object by clicking points. Stay completely on the outside of the object.
You can't undo during this step, so if you mess up, just hit the Esc key and start over.
If you don't want to start over, leave it as is and you can correct it in the next step.
When you are done with the polygon, press the Enter key and you should see something like this.

Here's what the colors mean.
Dark blue around the outside indicates the Background.
Lighter blue on the inside indicates Unknown.
As you draw foreground, the clear portions will indicate the Foreground.
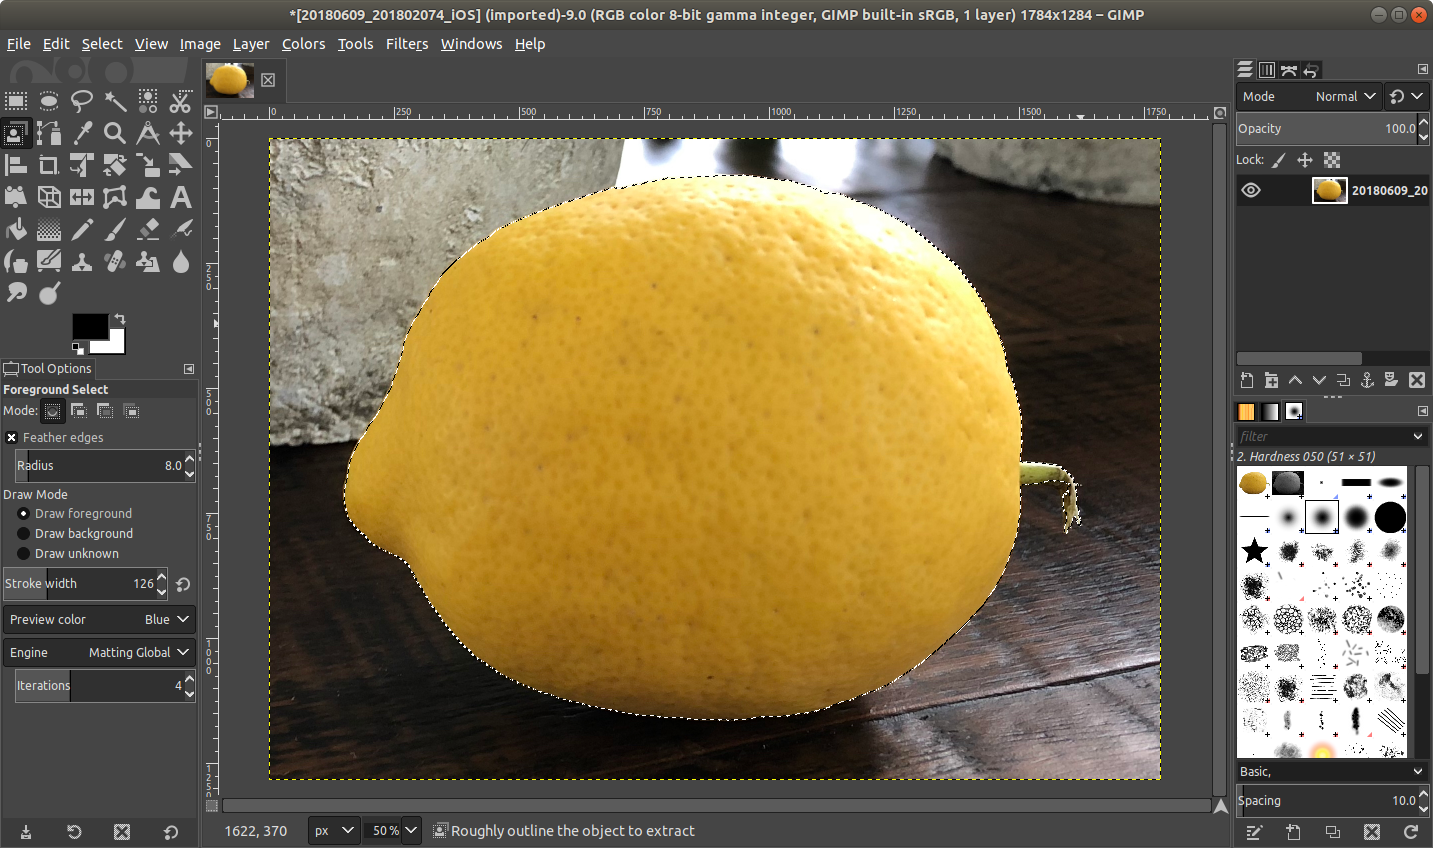
Take a look at the Foreground Select Tool Options tab in the lower left panel of the screen.
Make sure "Feather edges" is selected and set Radius to the number you chose earlier. (In my case, I chose 8, but again, it doesn't have to be perfect and feel free to experiment)
This controls the gradual transition from opaque to transparent at the edges, which will become visible once we take away the background
Choose "Draw foreground" to paint in the inside of the object.
Don't get too close to the edge, GIMP will automatically select your edge based on similar colored pixels
Use small brush strokes and undo if you make mistakes
Change the "Stroke width" to cover more or less pixels at a time
Choose "Draw unknown" if you accidentally go over the edge and want GIMP to figure out which pixels to select
Choose "Draw background" if you want to get closer to the outside edge
In the screenshot below, you can see that I left a margin of "unknown" but shaded in the foreground very close to the edges. You can play around with how close you need to get to have a nice selection. Eventually, you'll be able to do this really quickly. It took me less than 2 minutes to get a really clean cutout of this lemon.

Check "Preview mask" in the Foreground Select box in the top right portion of the image.
When you are satisfied, click "Select"
You will get a dotted line select boundary like the image below.
Copy and Paste to a New Layer
Copy the selection ["Edit" > "Copy"] and immediately paste it over top in the same spot ["Edit" > "Paste"].
Pay close attention to the Layer panel in the upper-right corner.
You need to click the green "New Layer" button indicated below. This will create a new layer for the pasted object.

Hide the Background
Click the Eye icon next to the original image to hide the background. You will be left with an isolated foreground.

Crop the image to fit the content. ["Image" > "Crop to Content"]
Now if you zoom in, you can see the smooth transition from solid to transparent at the edges.

Export as .PNG
Export the image with a ".png" extension so that the transparency/alpha is saved. ["File" > "Export As..."]
It's as simple as just changing the Name to "something.png". GIMP automatically does the right thing.
The default export settings should be fine.


With some practice, you can get pretty fast at this process. Repeat with as many examples of the object as you want on various different backgrounds. The more examples the better.
Hopefully this tutorial was helpful! If anything was unclear, please reach out to me and let me know.
Head on to the next part of this series...

Composing Images with Python for Synthetic Datasets
Learn how to compose images with Python for synthetic datasets. Full code on GitHub.